Black Gold for Your Indoor Garden: You Can Grow That!
Any idea what creature makes a nutrient-rich fertilizer that creates disease and pest resistance in plants? Hint: this little fella can boast that his “you know what” doesn’t stink.
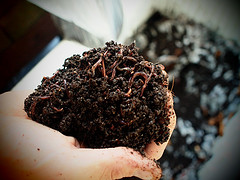
If you guessed earthworms, you’re correct. Worms may make some people squeamish, but the earthy smelling excretions, known as worm castings or vermicompost, help create a healthy indoor garden. Use what they call “black gold” in your houseplant soil mixes, and you can expect vibrant, prolific growth. A number of studies have also shown that plants given worm castings are more resistant to diseases and pests.
Buy bagged worm compost to add to your soil mixes at a rate of ¼ castings to ¾ potting soil when repotting, or place a 1-inch layer of castings on already potted plants.
If you wish to make your own worm castings, it’s relatively easy and can be done indoors or on a balcony or patio. Here’s how:
Get a Worm Bin
You want a container for the worms that has drainage holes for releasing excess liquid and a tray into which the solution can drain. You want a bin that is at least 1×3-feet and 2-feet deep.


(Photo, Engineering for Change)
Add Bedding
In order to live and make vermicompost, worms need a water-retentive material that is made out of organic material. Use shredded newspaper or corrugated cardboard. Soak the bedding in water and ring it out and then place in the bin, filling it 2/3 of the way full.
Place Worms in the Bin
For vermicomposting, you want to use redworms or red wigglers (Eisenia fetida), which out in nature live in environments with decaying vegetation. Put two pounds of worms in a standard size bin and more worms if the bin is bigger.
Feed Worms Kitchen Scraps
You can feed worms a wide variety of kitchen scraps, including vegetables and fruit, breads and pastas, oatmeal, beans and legumes and used coffee grounds and tea. Avoid attracting rodents by not putting in the bin dairy or meat products. And when you put in the food, make sure it is in small or ground up pieces, as this is easier for the worms to digest, and they will make worm compost more quickly for you.
Harvest Compost
About three months after you start the bin, it will be ready to harvest your first batch of compost. Thereafter you should get ready to use compost every six weeks or so.
It’s time to harvest the compost when a lot of the bedding has transformed into what looks like a dark, rich soil. To get the compost, scoop out the contents of the bin and spread it on a flat surface that has been covered by white butcher paper. Care fully remove the compost and put it in a clean container. As you do so, the worms will wiggle their way down to the bottom of the pile. After you’ve extracted most of the castings from the pile, fill the bin back up with bedding and add the worms, and then resume feeding them and repeat the process.
Maintain Your Worm Bin
Keep the worm bedding moist at all times by spraying with water when necessary. As long as the worm bin is kept moist, well stocked with food and bedding and is stored in a cool area out of direct sunlight, you shouldn’t have to replace any worms. They will procreate and produce plenty of offspring to continue creating vermicompost.
If you find that your worms have increased in volume and are outgrowing the bin, move them to a larger bin, or split them and start a second one. Then call an indoor gardening buddy and tell your friend you’ve got a goldmine to share.
For more information on creating your own wormbin, consult the classic Worms Eat My Garbage.


